How to Make Pumpkin Chocolate Chip Muffins

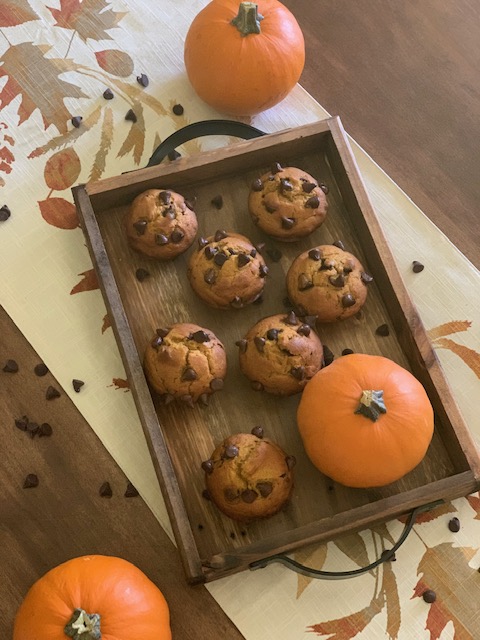
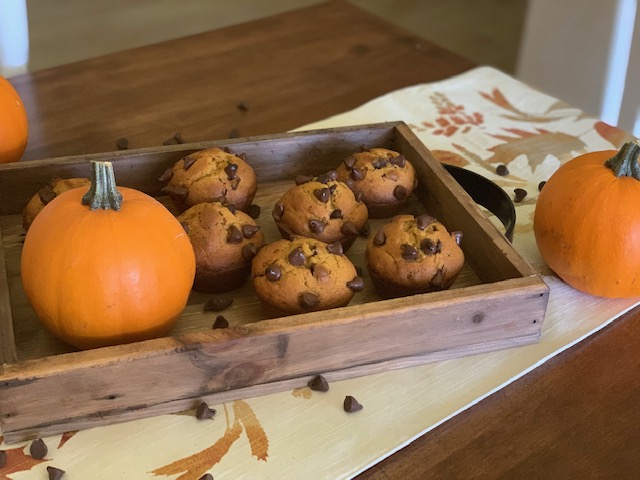
I am what you call BASIC. I love autumn, leggings, coffee, sweaters and everything pumpkin spice. I have a tradition every October 1st. I decorate for Halloween, put chili in the crock pot and watch Hocus Pocus. I’m not going to lie, sometimes I decorate early because I can’t help myself! So naturally, I had to kick off my favorite season with a pumpkin recipe. I tried a few different variations of this recipe before landing on this particular recipe. The others I tried came out too dense or too cake like. These muffins are perfectly balanced and depending on your love for chocolate you can adjust the amount of chocolate chips. Here’s what you’ll need:

  • Ingredients
    • 2 eggs
    • 1 cup sugar
    • 1 cup pumpkin puree
    • 3/4 cup vegetable oil
    • 1 1/2 cups all purpose flour
    • 1 tsp baking soda
    • 1/2 tsp baking powder
    • 1 1/2 tsp pumpkin pie spice
    • 1/2 tsp vanilla extract or paste
    • 1/4 tsp salt
    • 1 1/2 cups chocolate chips (I used semi sweet)
  • Method
    • Preheat oven to 400 F
    • In a large bowl whisk eggs, sugar, pumpkin puree and oil until well combined
    • Add flour, baking soda, baking powder, pie spice, vanilla and salt to the bowl and mix until just incorporated.
    • Fold in 1 cup of chocolate chips
    • Spray muffin tin with cooking spray or line with paper liners
    • Evenly distribute batter among 12 muffin cups and sprinkle the remaining chocolate chips on top
    • Bake for 15-16 minutes or until lightly browned
    • Cool in tin for 10 minutes, then transfer to wire rack to cool completely
    • Serve!
Yum!

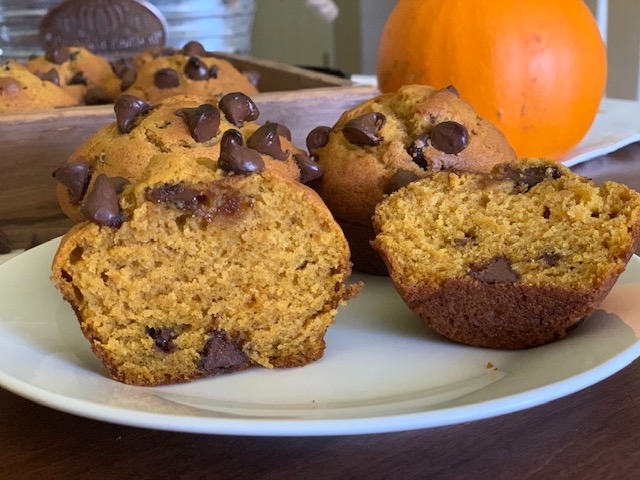
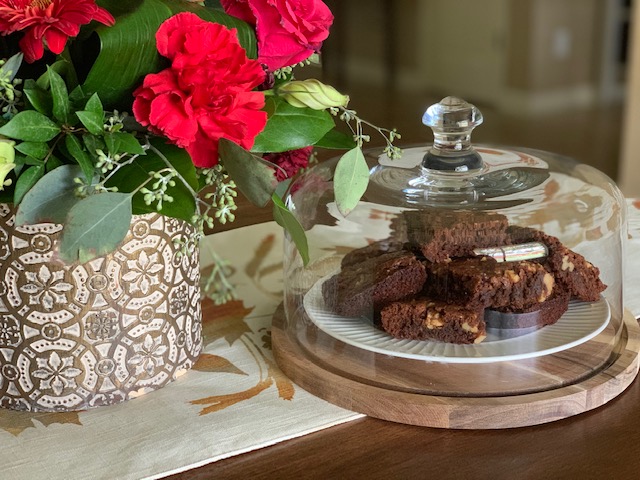
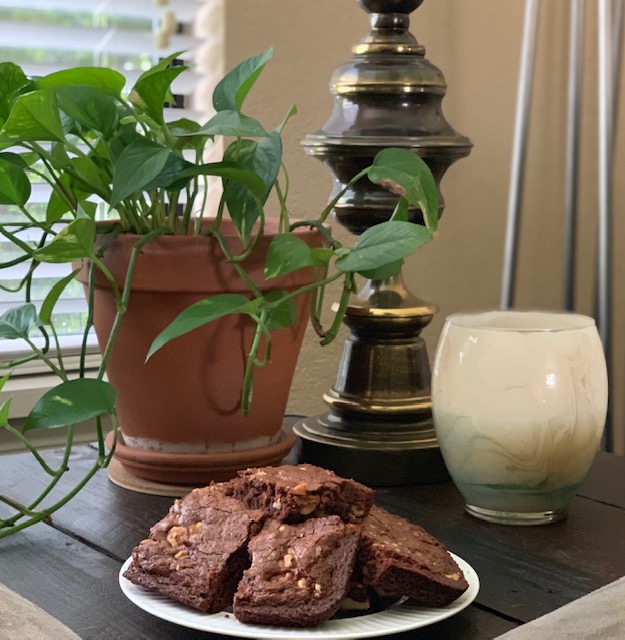
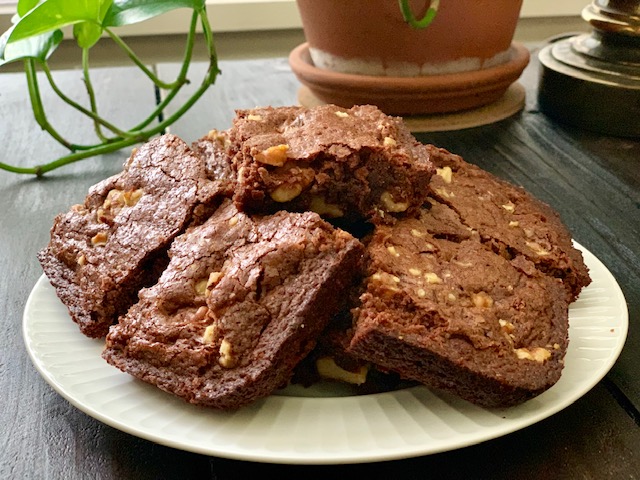
These muffins turned out delicious! They took no time at all to mix and bake, and no special equipment needed! Perfect to have on hand for company or with your morning coffee. I will definitely be repeating this bake every fall! Give it a try and let me know how it goes! Until next time!

How to Make the Perfect Brownies

Brownies usually fall into 2 categories….Fudgey or Cakey. I love both, but this recipe is a perfect mixture of the two. These brownies have a rich fudge flavor with a dense cake like texture. I have yet to find someone who doesn’t like them, and they are regularly requested in my house. You won’t need any fancy equipment for this recipe. A mixing bowl and wooden spoon will do. Here’s what you’ll need:

  • Ingredients
    • 1/2 cup flour
    • 1/3 cup cocoa powder
    • 1/4 tsp salt
    • 1/4 tsp baking powder
    • 1 cup sugar
    • 2 eggs
    • 1 tsp vanilla extract
    • 1/2 cup melted butter
    • 1/4 cup chopped walnuts (optional)
  • Method
    • Preheat oven to 350 F
    • In a mixing bowl add flour, cocoa powder, sugar, baking powder, and salt. Set aside
    • In a small bowl whisk together eggs and vanilla extract
    • Pour egg mixture into dry ingredients
    • Mix until well combined
    • Add melted butter and mix well
    • Pour batter into a greased 8x8x2 baking dish
    • Sprinkle walnuts on top (optional)
    • Bake for 30-35 minutes or until an inserted toothpick comes out clean
    • Let cool for 30 minutes
    • Slice and serve

This is hands down the easiest recipe I have ever executed, and the brownies turn out perfect every time! They are quick to whip up if you’re expecting company, or need to throw something together for a pot luck. Give it try, you won’t be sorry. Until next time!

Pumpkin Spice Meringues with White Chocolate Ganache Filling

Fall is upon us, and we are now in pumpkin spice season! Yahoo! Fall is by far my favorite time of year. I love everything from the decor and candle scents, to the weather and of course…. the desserts. I wanted to join in on the all the fall baking fun and this is what I came up with. I see macaroons, pies, cakes, cookies etc… But I haven’t seen many meringue sandwiches.

This is a pretty easy recipe, but it is time consuming. Those that are familiar with baking meringues, know there’s lots of waiting around. But they are so worth the wait! Here’s what you’ll need:

  • Ingredients for Meringue
    • 5 egg whites
    • Pinch of cream of tartar
    • 1 cup sugar
    • 1/2 tsp vanilla extract
    • 1 tsp pumpkin pie spice
    • Orange, green and brown food coloring
  • Ganache
    • 12 oz (1 bag) white chocolate chips
    • 8 oz heavy cream
    • Orange, green and brown food coloring
They look like pumpkins!
  • Method
    • Preheat oven to 175 F
    • In a mixer whisk egg whites on medium speed until they have a cloud like consistency (5-7 minutes)
    • Add sugar a tbsp at a time and continue to whisk until sugar is dissolved
    • Add vanilla extract and pumpkin pie spice, mix until incorporated
    • Continue whisking until you have stiff peaks
    • Separate 1 1/2 cups of mixture and place in bowl
    • Add orange food coloring and a touch of brown food coloring to larger portion
    • Add green food coloring to separated portion
    • Spoon meringue into piping bags fitted with nozzles of your choice
    • Line baking sheets with parchment paper
    • With orange mixture, pipe circles of meringue about 1 1/2 inches wide onto parchment lined sheets 30 bottoms, 30 tops
    • When piping the tops of the pumpkins be sure to swirl the meringue back on top of itself for added height
    • With green mixture, pipe stems, leaves and vines on the pumpkin tops
    • Bake for 2 hours (don’t open the oven while baking)
    • While meringues are baking, make ganache. In a saucepan, heat heavy cream over medium heat, removing from heat just before it simmers. Pour hot cream over white chocolate chips in a heat safe bowl and whisk until smooth
    • Add orange and brown food coloring to ganache to match meringues. place in fridge to firm
    • After 2 hours, turn oven off and let meringues cool in the oven for up to 4 hours
    • Pour ganache mixture into a mixing bowl and whisk until the texture is that of a whipped frosting
    • Spoon into piping bag and begin filling and assembling pumpkins
    • Serve at room temperature and store in the fridge

There you have it! Easyish, melt in your mouth ganache filled meringues. Not only do they taste like heaven, but they look adorable sitting on the counter. So give it a shot! You’ll be glad you did! This recipe won’t disappoint. Happy Fall! Until next time!

How to Make Citrus Zucchini Bread

One zucchini plant won’t be enough for two people, so I should plant two to be sure right? WRONG! I planted two zucchini plants forgetting how productive they are, and now I am up to my ears in zucchini trying to find different ways to prepare it.

I’m sure there are many others out there like me with a fridge full of overgrown squash and no clue what to do with it. I love plain Zucchini bread with walnuts, but I am also a lemon lover. So when I saw this recipe I had to put it to the test. Here’s what you’ll need:

  • Ingredients
    • 1 1/2 cups flour
    • 1/2 tsp salt
    • 1/2 tsp baking soda
    • 1/2 tsp baking powder
    • 3/4 cup sugar
    • zest of 1 large lemon (I used a meyer lemon)
    • 2 eggs
    • 1/2 cup vegetable oil
    • 1 1/2 tsp fresh lemon juice
    • 1 cup grated zucchini (drained)
  • Glaze
    • 1 cup powdered sugar
    • 4 tsp fresh lemon juice
  • Method
    • Preheat oven to 350 F
    • Grease loaf pan and set aside
    • Grate zucchini and place in a tea towel. Squeeze excess water and set aside
    • In a large bowl, whisk flour, salt, baking powder, and baking soda
    • In a separate bowl combine sugar and lemon zest. Add eggs, oil, and lemon juice.
    • Add dry ingredients and stir until well combined
    • Fold in drained Zucchini and pour batter into greased loaf pan
    • Bake 40-45 minutes, or until a toothpick inserted in the center comes out clean
    • Let cool in pan for 10 minutes before turning out on to a wire rack to cool completely
    • Make Glaze while bread is cooling by mixing powdered sugar and lemon juice until smooth
    • Once bread is cooled, drizzle glaze over the top.
    • Slice and serve!

Easy Peasy! The original recipe does not say to drain the zucchini, but I have found that when you leave the excess water, the bread has a bland flavor and soggy texture. I hope you enjoy this delicious, light summer dessert as much as I do! Please comment below if there is a recipe you’d like to see. Thanks for popping in! Until next time!

Grandma’s Old Fashioned Sugar Cookies

This recipe is without a doubt my most requested. Up until a year ago I would hardly share it, because some part of me wanted to keep it for myself. To say this recipe means a lot to me is an understatement. It is my late grandma’s “Famous Christmas Cookie” recipe. I helped her bake and decorate cookies every year until she passed. I have since taken over as family cookie maker and I look forward to baking these every holiday season. It’s not Christmas without these cookies!

I call them old fashioned because many of the sugar cookie recipes I see today call for butter. This recipe calls for shortening, which is what they used for sugar cookies when Crisco came out in the late 1800’s. In my opinion, shortening helps the cookies hold their shape and gives them a smoother texture.

Over the years I have tweaked this recipe a bit to get the texture just right and to keep them from spreading/puffing too much. For cookie orders, this is my go to sugar cookie. When using intricate cutters you need/want the cookies to hold their shape as best they can. Sharp lines and a flat top makes decorating much easier. Enough talk, lets roll!

  • Ingredients
    • 1 1/3 cups shortening
    • 1 1/2 cups sugar
    • 2 tsp vanilla extract
    • 2 eggs
    • 3 tbs milk
    • 4 cups flour
    • 1/4 tsp salt
    • 1/4 tsp baking powder
  • Method
    • Preheat oven to 375 F
    • In a large bowl whisk flour, salt, baking powder and set aside
    • In a large mixing bowl cream together shortening, sugar and vanilla extract
    • Add eggs 1 at a time letting each egg incorporate
    • Add milk and scrape bowl
    • Add flour mixture 1 cup at a time and let ingredients fully incorporate until dough comes together
    • Wrap dough in cling film and chill for at least 2 hours
    • Roll dough 1/4 thick and cut into desired shapes and place on parchment lined baking sheets
    • Bake for 7-9 minutes or until bottom edges of cookies are golden brown
    • Let completely cool before decorating
    • Makes about 3 dozen cookies. Do not double recipe

The sky is the limit when it comes to decorating! Just have fun and practice! This is a crowd pleaser that has stood the test of time. It’s simple and the kids always love helping. If you’re looking for a good royal icing recipe to pair with these sugar cookies, you can find one here.

Thanks for checking in! Until next time!

How to Make Mary Berry’s Victoria Sandwich With Buttercream

I am obsessed with the Great British Bake Off! It inspired me to start this blog. I watch it all the time and I’ve always wanted to make Mary’s Victoria Sandwich with homemade raspberry jam. I would never alter a Mary Berry recipe, but I did make a small change to the method. I used cake bands in order to make the cakes as flat as possible. These bands make stacking and decorating much easier. I highly recommend for beginners like me.

The tools you’ll need for this cake are:

  • Mixer
  • Digital scale
  • Two 8 inch cake tins

You can find Mary’s recipe here or just keep scrolling! Let’s get started!

  • Sponge Ingredients
    • 4 large eggs
    • 225 g sugar
    • 225 g self raising flour
    • 1 tsp baking powder
    • 225 g unsalted butter (room temp) plus more for greasing tins
  • Jam Ingredients
    • 200 g fresh raspberries
    • 250 g sugar
  • Buttercream Ingredients
    • 100 g unsalted butter (room temp)
    • 200 g icing sugar, sifted
    • 2 tbsp milk
It’s almost too pretty to eat!
  • Method
    • Preheat oven to 180C (350F)
    • Grease sides and line bottom of two 8 inch cake tins with parchment paper
    • Make 2 cake bands and place around tins (link is above)
    • Break eggs into a large mixing bowl and add flour, sugar, butter and baking powder
    • Mix until everything is incorporated
    • Divide mixture evenly between the tins and spread batter to the edge for a smooth finish
    • Bake for 25 minutes
    • Make jam while cakes are baking: Place raspberries in a saucepan over medium heat and mash. Add sugar, mix well and bring to a boil. Boil for 4 minutes, then remove from heat and pour into a bowl. Place in the fridge and allow to cool and set
    • Remove cakes from the oven and allow to cool for 10 minutes, before turning them out of the tins and placing on a wire rack to cool completely
    • Make the buttercream: Beat icing sugar, butter, and milk until smooth and fluffy
    • Spoon buttercream into a piping bag
    • To assemble, choose the least attractive sponge for the bottom layer
    • Spread with jam and pipe buttercream on top
    • Place other sponge over buttercream and decorate with fruit and a dusting of icing sugar
    • Serve!

There are quite a few steps, but overall this bake was fairly simple. The cake turned out beautiful in every way. The sponge is light and moist, the buttercream is fluffy, and the jam was delicious. As I expected, Mary’s recipe is perfect and I’ll be making this again in the future!

I am open to any suggestions as to what recipes to try next. I have a few up my sleeve but I’d love to hear from you! Until next time!

How to Make Personalized Homemade Dog Biscuits

I bought treats for my pup for the first 10 years of his life. As he got older his digestion changed, so I started making them myself with only 4 ingredients! I tried many recipes online but found myself altering them a bit to get a good rolling consistency. I also wanted the treats to have the same texture as store bought, and a longer shelf life than fresh homemade biscuits. After a while I developed my own version which has been a huge hit in my home. I have chosen to personalize the treats which adds a bit of charm and makes for an adorable gift. You can’t go wrong with peanut butter treats……all dogs love them!

These biscuits have the same snap as store bought!

INGREDIENTS 

  • 1 ripe banana
  • 1/3 cup chicken stock
  • 1/2 cup peanut butter
  • 1 1/4 cups wheat flour

Method:

  • Preheat oven to 350 degrees F
  • In a large bowl mash banana until smooth, leaving small chunks
  • Add chicken stock and combine
  • Add peanut butter and mix until well incorporated
  • Add flour 1/4 cup at a time mixing well in between
  • Place dough ball on lightly floured surface and knead until smooth (3 minutes)
  • Roll dough to 1/2 inch thick, cut into desired shape and place on baking sheet
  • Use biscuit stamp to emboss your pet’s name
  • Bake for 16-17 minutes
  • Let cool on baking sheet for 10 minutes
  • Have your pet enjoy as is or continue to dehydrate for prolonged shelf life
  • Dehydrate for 6-8 hours until no moisture remains in the center
  • Store in air tight container
  • Recipe makes 16-18 biscuits depending on cutter size

As you can see they are very simple to make. You can also make these organic by using all organic ingredients. The fact that these are so easy and way healthier for my dog is the reason I’ll never buy treats again. Plus they’re so cute!!

Hello from Birch Baking Co!

Hello, my name is Riana and baking is a passion of mine. I started baking as a little girl helping my grandma bake sugar cookies for Christmas parties. When she passed I took over as the family cookie baker, but put my own touches on her recipe. As an adult I have continued to make and decorate sugar cookies for family and friends, but I am happiest making cakes, brownies and other baked goods. I am by no means an expert baker. A lot of my cakes and bakes don’t look very pretty, but practice makes progress!

I am hoping this blog will push me out of my comfort zone by forcing me to try new things so I can share them with you. I have a few original recipes I will share, but my plan is to do my best to recreate famous recipes we have all grown to love by master bakers. I am open to suggestions and requests as to what to bake next.

Thanks for popping in!

Design a site like this with WordPress.com
Get started